
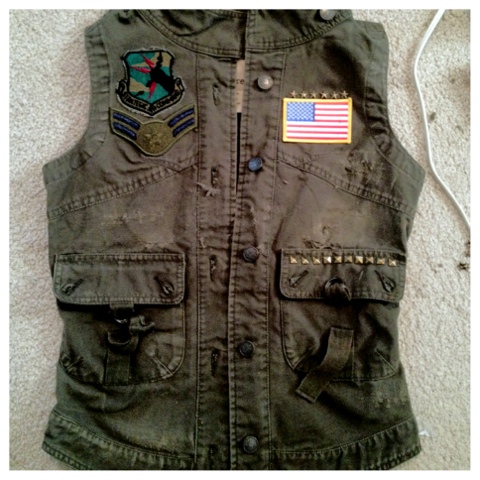
DIY distressed Military vest:
This vest is actually pretty old, i purchased it at Charlotte Russe for about $5 (on clearance) a couple of years ago. I never actually wore it though so i decided this could be a great DIY project. About a month ago i distressed it with a scissor and some sandpaper but i wasn't quite satisfied with the results, it needed more flavor. So Sunday while walking through the Village in NY the Hunnie & I stopped by this military store and picked up some patches for only a BUCK, yup i said it a BUCK! I'm really feeling the outcome, what do you girls think?
Things needed:
- Military vest/ jean jacket/ army jacket w/cut off sleeves
- Patches (I've also seen them on eBay)
- Scissors
- Iron
- No sew hemming tape (Joann's, Michael's, craft store etc.)
- Studs (purchased on eBay)
- The first step you would need to do is play around with the patches and the stones to see exactly where you would like them. Once you get that out of the way it's time to get to work =] .
- start cutting the no sew hemming tape to fit the size of the patches, place the patches where you originally wanted it and flip the vest inside out; being that the fabric of the patch is a Lil too thick and we need the hemming tape to get as hot as possible it's best to do it this way.
- Start ironing until the patch is completely attached to the vest (note: if you think that this bad boy is going to be in the wash a lot i advise for you to also add some fabric glue in the middle of each patch before ironing the hemming tape).
- Got the patches right where you want them? perfect! Now it's time for the studs (my favorite part <3). Put them fancy things wherever you'd like & VOILA!


you could probably find patches at a military surplus store too!
ReplyDeletecute :0)
ReplyDeletethx babes =*
DeleteWow this idea is really great! Thanks for sharing.
ReplyDeletexx J.
no prob pretty lady =]
Delete